It’s fairly easy to program a replacement keyless entry remote. Even better, what if you have two vehicles the same make, they use the same remote! Also when the battery goes bad remotes may require to be re paired with the vehicle.
Be sure you have all of your remotes handy, the process will clear the vehicle of any paired remotes and you will need to reprogram all remotes. Usually vehicles will accept up to four remotes…

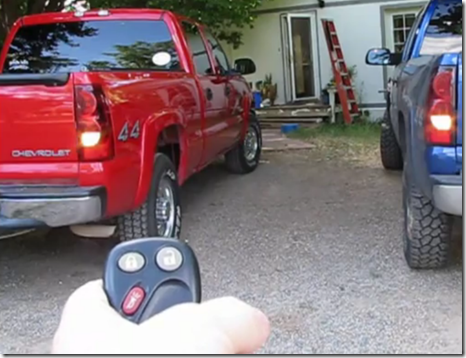
In the video I show how to program the remotes for a 2002-2005 GM truck. I repeated the procedure on both vehicles so the same remotes work on both vehicles. Even though the remotes have AES encryption with a rolling code, the remotes never fall out of program or stop working with both vehicles.
Obviously if you are only programming the remotes for a single vehicle the procedure is the same.
Apologies if the procedures outlined below do not work. Please do a Bing or Google search for your make and model of vehicle along with “Program Keyless entry” Some models require you to visit the dealer so that they can pair the key fob to your vehicle using their diagnostic computer.
Please note that more premium makes and models are usually a dealer only program job so you must take it in to get programmed. Some vehicles that must be programmed by the dealer may include most Cadillac’s, Pontiac G6, Chrysler 300, Saturn Vue, Chevy HHRLT. I will add to this list as I learn about dealer only vehicles.
GM
(Works on some GM vehicles from 2001 – 2005. This was the procedure for my 2003 and 2004 Silverado’s.)
1. Close all the vehicle doors.
2. Insert the ignition key into the ignition lock cylinder – do not turn ignition switch.
3. Press and hold the DOOR unlock switch (This is the switch on the door, NOT the remote).
4. While holding the DOOR lock switch in the unlock position, cycle the ignition ON, OFF, ON, OFF two or three times. If the door lock clicks after the second ON, OFF cycle do not do it a third time.
5. Release the DOOR unlock switch. The doors will lock and unlock one time to confirm the program mode is activates.
6. Simultaneously press and hold the LOCK button and the UNLOCK button on one keyless remote for approximately 15 seconds, the doors will lock and unlock to confirm the programming of that transmitter.
7. Repeat the previous step to program up to four transmitters.
8. Turn the ignition switch to the ON (one more click forward) position in order to exit the keyless entry transmitter mode.
9. Operate the transmitter functions in order to verify correct system operation.
2002 Camero
Matching Transmitter(s) to Your Vehicle
Each remote keyless entry transmitter is coded to prevent another transmitter from unlocking your vehicle. If a transmitter is lost or stolen, a replacement can be purchased through your dealer. Remember to bring any
remaining transmitters with you when you go to your dealer. When the dealer matches the replacement transmitter to your vehicle, any remaining transmitters
must also be matched. Once your dealer has coded the new transmitter, the lost transmitter will not unlock your vehicle. Each vehicle can have a maximum of four transmitters matched to it.
Have each transmitter you intend to match ready for the next steps. To match transmitters to your vehicle,
do the following:
1. Turn the ignition key to RUN, then to OFF. This will disarm the content theft-deterrent/alarm system (option).
2. Remove the RADIO fuse. This fuse is located in the main fuse block which is located on the left side of your instrument panel. See “Fuses and Circuit
Breakers” in the Index.
3. Turn the ignition key from OFF to RUN three times quickly (within five seconds). The vehicle will respond
by locking the doors, unlocking the driver’s door and releasing the hatch. Your transmitter is now ready to
match the vehicle. Leave the ignition in RUN.
4. Press and hold the LOCK and UNLOCK buttons on the first transmitter for 15 seconds. The vehicle will respond as in Step 3.
5. Repeat Step 4 for the remaining transmitters.
6. When you have finished matching all of your transmitters, replace the RADIO fuse.
7. Check that all transmitters work by pressing the buttons. If the transmitters don’t work, or if you’d rather not match the transmitters yourself, see your dealer.
Ford
1. Insert a key in the ignition and turn from OFF to ON eight times in rapid succession (within 10 seconds) with the eighth turn ending in the ON position.
2. The doors will lock/unlock to confirm that programming mode has been entered.
3. Within 20 seconds, program a remote transmitter by pressing any button on a transmitter. The doors will lock/unlock to confirm that the remote transmitter has been programmed. (If more than 20 seconds pass before pressing a remote transmitter button, the programming mode will exit and the procedure will have to be repeated.)
4. Repeat the previous step to program additional remote transmitters. The doors will lock/unlock to confirm that each remote transmitter has been programmed.
5. When you have completed programming the remote transmitters, turn th ignition to OFF or wait 20 seconds. Again the doors will lock/unlock to confirm programming has been completed.
Dodge
1. Turn your key to the “Run” position, but do not start the engine. Shut the doors and wait for the warning beeps to stop.
2. Hold the “Unlock” button on the currently programmed remote for five seconds, and then press and hold the “Panic” button (while still holding “Unlock”) for one second.
3. Press and hold the “Lock” and “Unlock” button on the same remote for a few seconds, then release the buttons and press the “Unlock” button.
4. Press and hold the “Lock” and “Unlock” button on the new remote, then release the buttons and press the “Unlock” button. Repeat the procedure for up to four remotes within 30 seconds.
Dodge Ram (2002 to 2005)
1. Sit in the driver’s seat and buckle the seat belt. Make sure all the doors are closed. Put your key in the ignition and turn it to “On.” This mode turns on your electronics without cranking the engine.
2. Hold “Unlock” on your working keyless-entry remote. After four seconds, press “Panic” while holding “Unlock.” You’ll hear a warning chime; release both buttons.
3. Press and release “Unlock” and “Lock” simultaneously on the keyless-entry remote you are programming.
4. Listen for the warning chime. Press “Lock” on the remote you are programming within four seconds of hearing the chime. You’ll hear another chime. This indicates the remote is programmed.
Dodge Dakota and Durango (2001 to 2004)
1. Take a seat in your vehicle and close the door. Press “Lock” on a currently-programmed remote five times, allowing two seconds to pass between each press.
2. Place your key in the ignition. Turn it to “Run.” Keep it in run until the chiming stops. Once the chiming stops, press and hold “Lock” for four seconds on the programmed remote. After four seconds, press and hold “Panic” along with “Lock” for one second, and then release both buttons. Listen for a single chime.
3. Press and release “Unlock” and “Lock” on the remote you want to program, and then press and release “Unlock.” Listen for a single chime. This indicates the remote is programmed.
Dodge Neon (2000 to 2006)
1. Place the key in the ignition. Turn it to “Run.” Press and hold “Unlock” for four seconds on the programmed remote.
2. Press and hold “Panic” for one second, while holding “Unlock,” and then release both buttons. Listen for the chime.
3. Press any button on the remote you want to program. A single chime is heard, indicating the remote is programmed. Press any button on the previously-programmed remote (it must be resynchronized). Turn the engine off and test each remote.
Toyota
1. Ensure the car doors are unlocked and open. Pull the key from the ignition.
2. Insert and remove the key from the ignition two times within five seconds. This will start the required sequence to reprogram the car’s computer.
3. Close and open the driver’s door twice within 40 seconds. This step has to be within that time, or the system will reset.
4. Insert the key into the ignition. Do not turn the key yet.
5. Cycle the key from “lock” to “on.” You will need to cycle this step one time for the “add” mode.
6. Remove the key from the ignition. Immediately grab the transmitter to complete the program.
7. Press both the lock and unlock buttons on your transmitter simultaneously for 1 to 1 1/2 seconds. Release the buttons afterwards.
8. Press the lock button within three seconds of releasing on the last step. This will complete the process. The door locks will cycle from lock to unlock if the process is done correctly. If there is a problem, the lock will cycle twice.
9. Open the driver’s door. This will complete the process.
Nissan
1. Open the driver’s side door of and get in the vehicle. Close the door. Press the lock button on the driver’s side door to lock all the doors.
2. Insert your key into the ignition and remove it at least 6 times. It may take up to 10 times. This needs to be done in a good pace, but not too fast. At least 6 times within 10 seconds is about right. If you have done it right, you will see the hazard lights flash twice.
3. Once you see the hazard lights flash twice, the car is now in program mode. Insert the key back into the ignition and turn it to ACC. Push any button on your keyless entry FOB remote ONCE. This should be done within 5 seconds of turning the key to ACC. You should notice your hazards flash again. If you have another remote to program proceed to step 4, otherwise turn the key off and remove it. The remote should now be programmed.
4. If you have another keyless entry remote to program unlock the door with the driver’s side power lock and then lock them again. Press any button on the next remote. Turn the key back to the original position and remove the key. The remotes should now be programmed.
JEEP
1. Enter your Jeep and make sure all of the doors and the trunk are closed.
2. Put your key in the Jeep’s ignition and keep the key in the off position.
3. Open the driver’s door on the automobile and leave the door open.
4. Move the switch on the door to the lock position while the door is open.
5. Switch the key in the ignition two clicks to the right to the “On” position.
6. Press the lock button on your keyless remote for your Jeep and hold the button for 5 seconds. Release the button and remove the key from the ignition to complete the programming.
Hyundai
1. For a 1994 to 2006 Sonata, a 2001 to 2006 Elantra, a 2000 to 2006 XG350 or a 2001 to 2006 Santa Fe, you will need to access alarm system control module. On most of those vehicles it is located on the driver’s side fascia panel. But on the Sonata, the facia panel is in the center.
2. Once you have found this module, you will want to ensure that the memory switch is in the OFF position. Then turn the ignition on.
3. Wait 5 seconds and set the memory switch to SET position and then press the remote transmitter lock button to send the code to the alarm system control module.
4. If you would like to program a second remote transmitter then you will need to press second remote transmitter lock button.
5. Next set the memory switch to off, then turn the ignition off. You can confirm your programming by locking and unlocking the vehicle with both of the remotes.
Mitsubishi
2000 Eclipse
1: With the key in the ignition (key off or possibly on) and all doors closed, ground pin 1 of the DLC connector. (Same as jumping pin 1 to pin 4…Pin 4 is ground. Due to the location of DLC, I found it easier to just use 1 wire to ground pin 1)
2: Immediately, press the hazard switch 6 times. (on and off 3 times…) Locks will operate to acknowledge programming mode.
3: As soon as locks operate, press lock button on new remote and release. Pause a couple of seconds, then press lock button on remote again twice and release. Locks will again operate to acknowledge programming.
4: Remove ground jumper from DLC connector.
5: Remove key from ignition switch. (Remote won’t work with key in switch)
1993/4 – 1998 MONTERO/PAJERO/SHOGUNS
First off, you must have the correct key fob, if not, will not work. Up to four key fobs will work and depending the amount will determine how many time you have to program each one.
IE: 1 remote – program 4 times
2 remotes – program each remote 2 times
3 remotes – program 2 remotes 1 time and the last one 2 times
4 remotes – program each one
1 step -Open the drivers door (gotta remain open) and interior/dome light on (main light)
2 step – Turn the ignition switch to the ‘on’ or ‘ignition’ position (DO NOT START engine)
3 step – Press and hold the emergency override button (small red button on left side of steering wheel), around by the 14th second, the horn will sound 3 times. {This indicates that the unit has entered the transmitter programming mode……………..KEEP HOLDING THE OVERRIDE BUTTON}
4 step – Press the lock/arm button on the remote (the remote being programmed) The horn will sound once, indicating that the system has learned that remote.
5 step – repeat step 4 for either same remote or add’l remotes (the fac system must acknowledge 4 memory lots , hence the possibility to program 4 remotes.)
6 step – Turn the ign switch to off position and release the override button
50 thoughts on “Programming a Replacement Keyless Entry Remote”
2005 Pontiac Grand Prix.
Remove the ignition key from the ignition lock cylinder.
Close all of the vehicle’s doors.
Remove the MALL PGM fuse from the fuse panel. Refer to Electronic Diagnosis in Body and Chassis.
Turn the ignition lock cylinder to the ACC position.
Turn the ignition lock cylinder OFF, then back to ACC within 1 second.
Open and then close any vehicle door. You will hear a chime when the remote control door lock receiver enters the programming/diagnostic mode. If you do not hear a chime, start again at step 1.
Important
After 7 seconds, you may hear a chime confirming successful synchronization. After approximately 14 seconds, you will hear a chime confirming successful programming.
Press and hold the transmitter LOCK and UNLOCK buttons simultaneously for 14 seconds.
Repeat step 8 in order to program each additional transmitter.
Remove the ignition key from the ignition lock cylinder.
Install the MALL PGM fuse back into the fuse panel. Refer to Electrical Diagnosis in Body and Chassis.
Validate that all the transmitters that were programmed operate properly. Refer to Keyless Entry System Operation
is this the same process that has to be used for a 2005 pontiac grand am
Tried these instructions last night on my 2005 Grand Prix. The don’t work! I checked both fuse panels and there is no “MALL PGM” fuse in either of them.
Is there a way to do this with Subaru?
Thanks!
Here is a link where I found a LOT of subaru info, scroll down and there are sections on how to program for vairious years and models.
http://www.cars101.com/subaru/keyless.html#05%20legacy%20program%20remotes
I have a 2005 chevy impala . what is the procedure to reprogram my remotes ? The remote that I have did not come with a vehicle. I have tried the you reprogramming method you have listed above for GM, and it does not seem to work for me . if you can let me know any other information that would be great thank you .
Here are instructions for the 2005 Chevy Impala.
http://www.ehow.com/how_6234868_program-keyless-entry-2005-impala.html
http://www.programyourremote.com/classified/DisplayAd.asp?id=309
Do you have the instructions for a 2005 Saturn Vue? Any help would be appreciated. Thanks!
It appears the Saturn Vue requires a locksmith or dealer.
Hours of searching. Help with programming, please. 1993 GMC Suburban with a 4 button Python fob (RPN 474P). Thank you so much!
Sorry I can’t help with aftermarket instructions 🙁
I just programmed 2 fobs on our 05 Saturn Vue with a Snap-On Solus and the “hold unlock and lock” for 15-20 seconds. Granted the one new key fob had a weak signal, I swap the new touch pad and cover to the old circuit board and works flawlessly. I am going to contact the dealer where I purchased the new fobs from at $52 each…Has there been a run on circuit board issues?
If your buttons are not responding properly some liquid or vapor may have built up some gunk on the board or bottom of the buttons. Try alcohol and a q-tip and clean the circuit board and under side of the buttons.
I have a 2001 cadillac deville I have a replacement button for You think you might be able to help me out with that?
Sorry you need a GM dealer or locksmith to program 2011 Cadillac. This is true for all Cadillac’s I have searched for so if you have a caddy, you are probably out of luck.
How about a chrstler 300 2006
Chrysler 2006 model 300 requires a dealer to program sorry.
Here are some general Chrysler programming instructions.
http://www.ehow.com/way_5448400_keyless-programming-instructions-chrysler-cars.html
http://www.cheapfobs.com/chrysler-keyless-entry-programming
http://www.ehow.com/how_5014707_program-chrysler-keyless-entry-remote.html
What about a 2006 Chevy HHR LT? Lost the fobs a while ago. Never thought to get new ones! But, now I have another fob… and can’t find out how to reprogram it. I’ve looked everywhere (except the dealership)!
It looks like 2006 Chevy HHR LT is dealer only.
What about a 1996 toyota camry?
Here is a possible procedure for 1996 toyota camery.
there should be a control unit under the drivers seat. It’s a black box with a few electrical connectors plugged into it. This might be a 2 person job, but if it’s a Toyota, this will work.
There is a small green button on the control unit, it’s kind of recessed, and you’ll need to get a small screwdriver or paper clip to get to it. All the doors must be closed, so the best bet is to push the drivers seat all the way forward, and access the control unit from the back seat. I suggest leaving the rear door open and kind of lay on the ground/back floor of the car, and have someone else hold the door switch closed, as if the door were actually closed.
Key on, door switches all closed, press that green button, and wait about 5 seconds….. press the button on the remote. You’ll hear a beep, and you are done.
IS there reprograming available for keyless entry of a 2010 Dodge Charger?
Try this for Dodge Charger 2010
http://www.chargerforums.com/forums/showthread.php?t=138139
Hi!
I have 2001 Vauxhaull/Opel Corsa-C. My remote in the key has stopped working. I have bought a new remote. So, can you please tell that how can I program my new keyless entry remote?
Thanks
2001 Vauxhaull/Opel Corsa-C. If it is a brand new key you will need a tech 2 programmer it seems. These links will help.
http://www.corsa-c.co.uk/forum/archive/index.php/t-68291.html
http://www.youtube.com/watch?v=80vmKuL6M18
Will your method work for an 05 Cobalt?
2005 Cobalt is a dealer only program job.
Befor asking in the comments please perform a google search for “Keyless Entry Program” and also include the make, model, and year of your car.
Hi I have a Pontiac Grand am 2000 coupe that I am trying to install and keyless entry. I have a googled and tried the steps and it don’t work I don’t know if I’m missing something or what. Maybe youcan give me your instructions please?
Sorry, as far as I can tell it should be like the chevrolet procedure in my video.
can u help i have a 1995 impala ss
I have a 2001 Dodge Dakota. I do NOT have the original FOB. I just bought one that needs to be programmed. Do you know how this can be programmed without feeding the dealership a large check!?
Thanks!
Sherri
Can you help with a 2008 pontiac g6?
The 2006 G6 can not be done by you and must be done by the dealer or locksmith sorry
Hi I have a 1997 Chevrolet Venture Minivan and can
‘t seem to program my new remote that I purchased I tried your instructions and it didn’t work. I even looked up how to program it from other people and I even tried to jump the OBD-2 data Link connector pin 4 and 8. I have the 4 pin wire but thres no 8 pin wire. Can anyone help me.
Thanks, Eddie
Here is the procedure: for a 1997 Chevy Venture
1. Remove key from ignition switch.
2. Remove the MALL PGM fuse, from fuse box
3. Close all doors.
4. Turn ignition switch to ACC.
5. Within 1 second turn the ignition switch to OFF then back to ACC
6. Open and close drivers door.
7. A chime will sound indicating you are in programming mode.
8. Press and hold the LOCK and UNLOCK buttons together until chime sounds twice,
about 14 seconds.
9. Repeat step 8 for any additional remotes.
10. Remove key from ignition and replace MALL PGM fuse.
11. Test remotes.
Hi I tried this several times and I don’t get the chime sound in step #7. Is there something else I can try.
Thanks, Eddie
Thats all I could find sorry. If you are trying the jumper method on the OBD connector and are missing a connector pin just jump the existing pin to ground(metal body of your vehicle)
Do you have instructions for a 2009 Pontiac G6 with a remote starter keyless entry?
2005-2009 Pontiac G6 requires a dealer or locksmith to use a OBDII tool to program the keyfob, sorry.
HI, any chance for 2002 Nissan Primera? thanks
Hi very good information! I need to reprogram a new entry remote control for a Toyota Hilux Vigo 2010, The problem is, the remote control will not shut the alarm off when the car is park, but it will run the car fine;as long i am driving all seems OK, if I turn the car off and somebody walk by… the alarm start, and I will turned off then it start over. seems to me that I may need a new remote, but need to be reprogramed, Help.. please and thanks
What about a 1993 Chevy Suburban?
Great stuff, here! I’ve always wondered about the intricacies when it comes to programming a remote; I have a Chrysler now but am thinking of getting a Ford, too – if it’s a different make/model, can you still do the same thing and hook up one remote to open both?
Unfortunately it only works with the same manufacture and only with some years of vehicles 🙁
Ah, okay – well, thanks for your response and yeah, that does make sense… you’d probably have to do a lot of re-configuring and customizing to somehow get them to work together…
What about when replacing an OEM keyless entry remote from a site like chipkeys.com? Do you know if it would be possible to program those to work just as easily, or might visiting a dealership and paying the extra fee be worth it in that case? (this would be on a 2008 Chrysler Sebring…)
Yah those aftermarket key fobs work great, just get the right one!
Great, thanks! I’ll make sure to follow the directions on the site to match the specs – I appreciate your help!
Is there an easy way for a 1995 Buick century custom? Please help.
can you tell me how program a key for a 2004 saturn vue